Backcountry Fly Fishing
Backcountry Fly Fishing | Fly Fishing Blog 2 | Fly Fishing Gear Reviews | Fly Fishing Blog | Backcountry Fly Fishing Gear Reviews | Tenkara | Destinations: Flat Tops | Destinations: Weminuche
Backcountry Fly Fishing Gear Reviews

Click HERE for a list of clothing and equipment for a 9 day backpacking/fishing trip

When packing flyfishing gear for a trip into the backcountry, you have to make some compromises.  You are carrying all of your food, clothing, sleeping bag, tent, and other equipment you will need for the trip, and weight and space need to be kept to a minimum so you don't end up feeling like a pack mule.  A lighter pack means you can cover more miles, and still arrive at camp fresh enough to enjoy some afternoon fishing.  That said, I try not to skimp on the essential fly fishing equipment.  If I'm spending a week tromping through the mountains so that I can fish, I bring enough fishing gear to make sure I can fish effectively.   
Here are some gear tips to lighten your load and help you enjoy fishing far from the car:

Waders
 

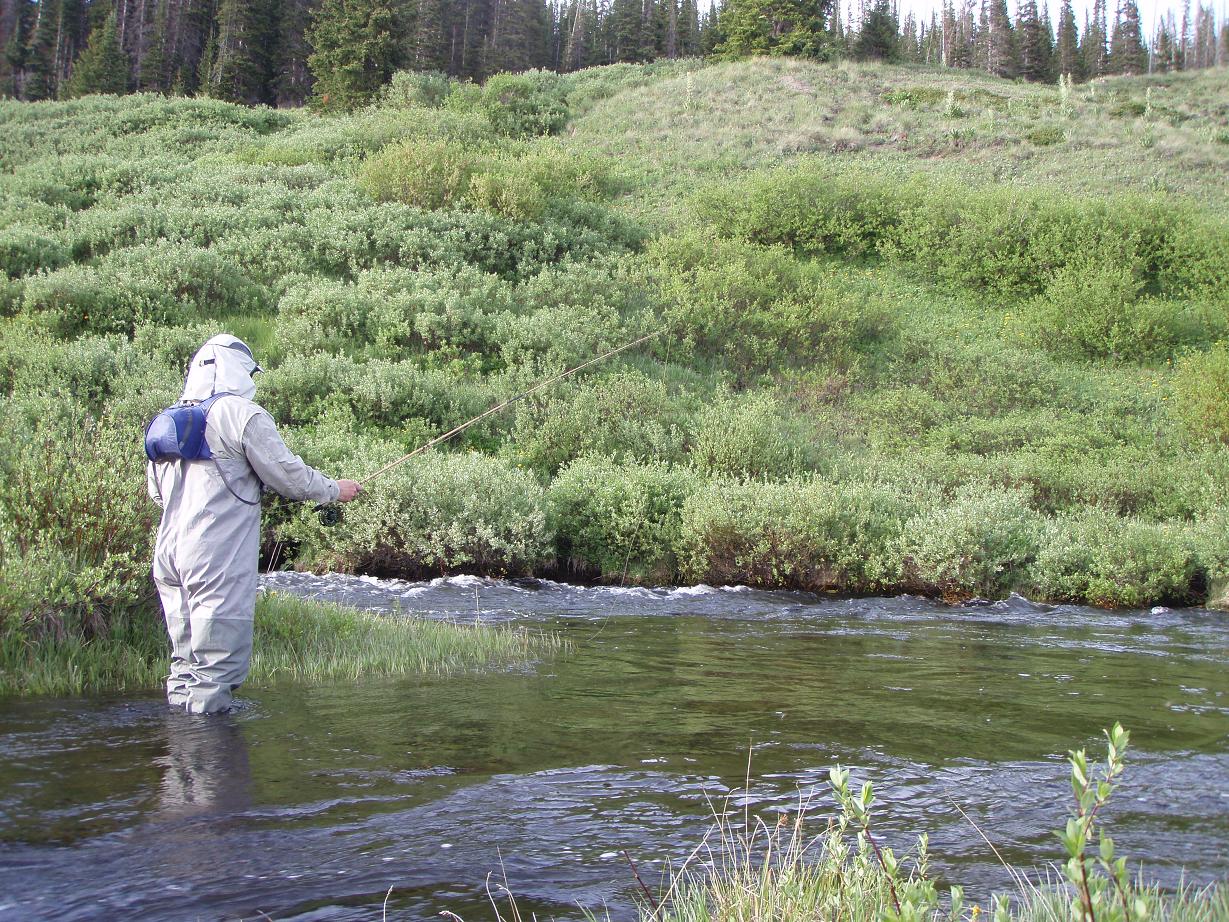
I usually bring waders with me when I'm backcountry fishing.  When I first started fishing the backcountry, I left my waders at home.  I figured that I didn't want to carry the extra weight and bulk of waders, and that I would just wet wade or fish from the banks.  However, I found that trying to fish without waders can be rather inefficient.  I'd get cold from the snow-melt fed water and have to get out and warm up.  


If I fished at the lower elevations, where the water is warmer, I would be happy to wet wade, but in the mountain terrain where I do most of my backcountry fishing, I like the protection of waders.  Other folks who are tougher than I am may be able to stand in 40 degree water all day long and not be bothered by the cold.  I'm something of a wimp, however, and much prefer waders.    


If I try to avoid standing in freezing water by fishing from the banks, I get my line caught on trees or brush behind me, or lose flies and tippets snagged on things in the water.  Fishing from the banks, it's difficult to cover the water or pick my position.  It's a lot more efficient to be able to wade.    


Sadly, the very best backcountry waders I've ever used are no longer made.  The Simms Freestone Travel Waders were the ideal backcountry solution and the lightest and most compact breathable waders I know of. Weight is 1 pound, 6 ounces for a size large, including the wading belt and stuff sack. They breath well, are comfortable and pack into a very small package. They are pretty durable too, considering their light weight.


They have cordura nylon booties instead of neoprene, which cuts down on weight and bulk. Since my backcountry trips are typically in the summer time, I don't need the neoprene for warmth. They don't cost an arm and a leg either, which is nice.  When I found out that Simms was discontinuing them, I ran out and bought a couple extra pair, so I'm set.   You can still occasionally find them on internet stores or Ebay, and if you do find a pair in your size, I'd highly recommend that you buy them. 
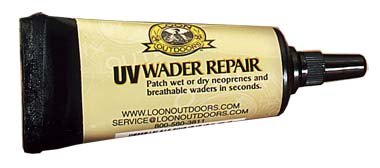
 

Although the Simms Travel Waders are gone, there are lots of other options that are not a whole lot heavier and bulkier.  LL Bean sells a lightweight wader, the Flyweight II.  They weigh about 2 pounds.  As an added bonus, lightweight waders cost a lot less than the heavier, super duty waders.  (the Bean Flyweights cost only $59, which is a bargain in my book.)  If you look, I'm sure you can find other lightweight options from the other big companies.   


Simms Travel Waders and WJ Ultralight Vest/Pack
travelwaderssm.jpg

Wading Shoes
 
You will need wading shoes, whether you're wet wading or using waders.  I've tried a number of various wading footwear options, and have some preferences for backcountry wading footwear. 
 
First off, there is the choice of soles.  The two main types are felt or rubber.  The best rubber soles are the excellent "aqua-stealth" soles on a number of high-quality wading shoes.  Rubber soles have a number of advantages for backcountry fishing.  In the backcountry, your wading shoes are inevitably going to be used for a lot of walking and bushwhacking as well as wading.  Felt soles don't work very well at scrambling down steep, wet, grassy banks, or on the steep narrow game trails that often follow a stream course.  For any sort of scrambling on steep terrain out of the water, the rubber soles are significantly more secure than felt.    Also, backcountry fishing often involved a fair amount of hiking, and rubber soles last longer than felt. 
 
However, felt soles have a big advantage when it comes to wet traction.  Sometimes, the slimy rocks that litter the streambeds are so slippery that rubber soles simply won't stick, and wading becomes very inefficient. In these cases, a felt sole is really the only functional option.  
 
So, what to choose?  If your travels involve mostly lakes, then go with the rubber soles.  If you spend most of your time wading mountain streams with slippery bottoms, then go for felt.  Another option is to use combination soles made from both materials, or use Korkers boots which have interchangable soles.     
 
I briefly experimented with a couple designs of wading sandals.  They didn't give my feet enough protection during hiking or wading.  I'd have no problem using them on a roadside fishing trip, but I want something a bit sturdier and more protective if I'm fishing miles from the trailhead and can't really afford a hole in my booties or a sprained toe. 
There are a number of relatively light weight wading boots on the market, but I prefer a wading shoe design.  Built sort of like a running shoe with a wading shoe sole and better drainage, a wading shoe provides a good compromise between light weight, compactability, and protection. 
 
A number of companies make these types of shoes.  The ones I use are made by a company called "Bite."  They are the "Portage" model.  They have a sole constructed of part felt and part rubber and come with a built in gravel guard.  Best of all, I got them on sale for $40. 

Weight for various shoes and boots I've used is given below.  Note that the Bite shoes are the lightest at 17 oounces per shoe.  That's not bad, considering that they include a built in gravel guard. (They sell a similar shoe without the gravel guard that is less expensive, and almost certainly a bit lighter, but I like the built in gravel guard feature.) The Cloudveil comes closest in weight to my Bite shoes, but would require a seperate gravel guard which would add a few ounces.

Other company's wading shoes are no doubt as good as the Bite shoes I own.  Just look for some that weigh about a pound or less per shoe. 

Simms L2 Boots and Bite Shoes
wading.jpg
You can save almost a pound of weight by using wading shoes instead of boots

Weights of Various Wading Shoes  (weight is for one shoe, not a pair)  
 
LL Bean "Ultralight II" wading boots, studded rubber soles  23.4 ounces
 
Orvis "Pack and Travel II" wading boots, felt soles  19.8 ounces
 
Simms "L2" wading boot, rubber soles  23.8 ounces
 
Bite "Portatge" wading shoe, rubber/felt soles 17.1 ounces
 
Cloudveil "8x" wading shoe felt soles  18.2 ounces
 
Korkers "Cross Current" wading boot felt soles 19.1 ounces (With rubber hiking soles, 20.2 ounces)  (felt soles alone are 3.8 ounces each) 
 
Hodgman "Stream King" wading boot felt sole 21.7

Seal Skinz Waterproof Socks
 
These are some very useful socks because they allow you to hike in wet wading shoes without getting your regular wool socks wet.  If I'm going to hike more than a mile to the spot where I am going to fish, I don't like to wear waders for the hike, particularly if the weather is hot.  The problem is that on the return trip, your wading boots are going to be wet, and if you don't wear your waders, your socks will get soaked.  These waterproof socks take the place of waders when hiking in wet boots.  So, on your hike out you can wear these waterproof socks in place of your waders and not have to worry about getting wet socks and feet.  They also provide waterproof protection for your feet when walking through bogs and other wet areas.    
These are perfect for long day trips or side trips from a backcountry base camp where you'll be hiking a fair amount and don't want to wear your waders while hiking, and don't want to bring an extra set of footwear.    


Seal Skinz Waterproof Socks
sealskin.jpg

Rod and Reel
 
Pretty much whatever fly rod you use close to home will work in the backcountry.  I typically carry a rod that is designed to cast a line between 4 and 6 weight.  A 6 weight is my choice if my destination will involve mostly lakes, because a 6 weight gives some extra distance, particularly when casting into the wind.  For stream-oriented trips, a 4 weight is a great choice, and for a mix of the two, a 5 weight provides maximum versatility.  
 
A rod with a lot of pieces will break down into a small, compact package which is convenient for carrying.  However, some multi-piece rods with lots of pieces don't cast all that well.  One rod I've used that breaks down very small and still casts very nicely is the 7 piece March Brown Hidden Waters rod.  I own three Hidden Waters rods in 4 weight, 5 weight, and 8 weight configurations.  I bought them all off of various internet stores or Ebay for less than half of the suggested retail price.  Although I've pretty much switched to bamboo rods now and sold off all my other graphite rods, I've kept the March Browns because they are so compact and cast so well.  
 
However, I haven't really found it essential to carry a rod with a lot of pieces.  My rods of choice these days are bamboo rods in either two or three piece configurations.  You need to be a bit more careful with a long rod tube strapped to your pack as it will get caught in the brush easily, but otherwise there is really no great disadvantage to a two piece rod. 
 
The bottom line is that if you already have a fly rod that you like, it will likely work just fine for backcountry fishing. 
 
The same goes for reels.  Get any high quality, lightweight aluminum reel, and you're set. 
 
One piece of advice:  If you're going on a long trip, bring a back-up rod.  No need for every person on the trip to have a back-up, but bring one back-up rod for the group.  I've had three friends break fly rods while on long backcountry trips.  Having a back-up rod can save the trip when this happens. 
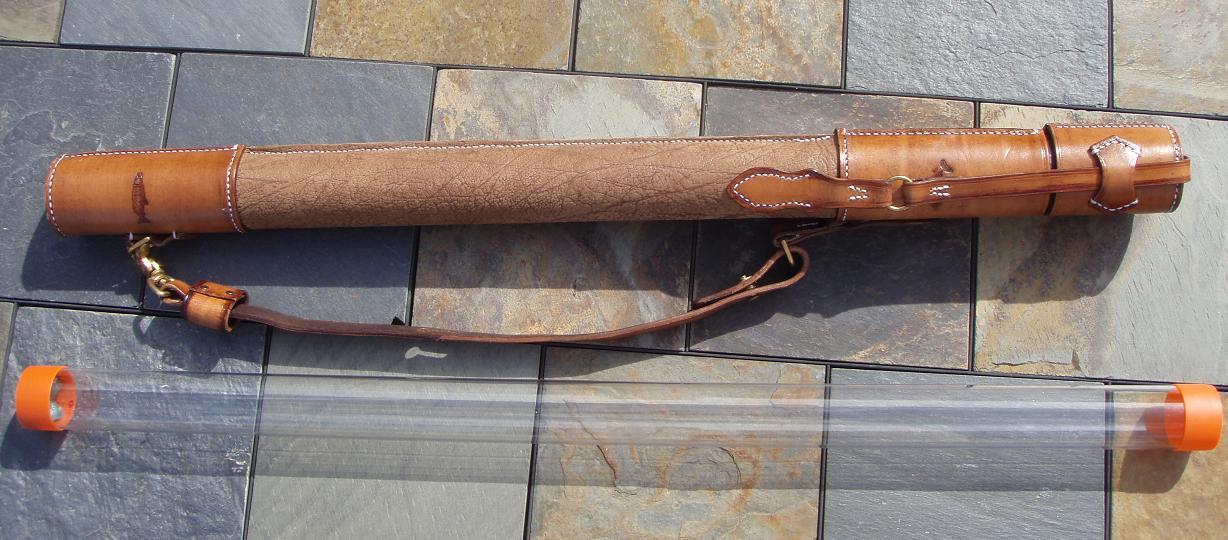
 
Link to March Brown Web Site
 
 
Butyrate Rod Tube
 
Most rod tubes that come with your rod are not ideal for backpacking.  Whether they are aluminum or the cloth wrapped plastic, they are typically heavier than is necessary.  This is a piece of gear where you can save some weight. 
 
For some time, I've been using lightweight Tenite Butyrate tubing to carry and protect my rod when hiking.  The weight savings can be substantial.  A four foot aluminum rod tube weighs 1 pound, 8 ounces, and I have been able to get 1/16 inch wall thickness butyrate plastic tubes of the same length for less than half the weight.
 
These plastic tubes do a good job of protecting my rods.  You need to buy the tubing in 8 foot sections and cut it to length yourself with a hacksaw.  Slide-on end-caps are available that fit the tubing.  I use glue to permanently affix the bottom end-cap in place.     

1/16 inch thickness is the thinnest I would recommend if you are strapping your rod to the outside of your pack and you are doing any off-trail bushwhacking.  If you have a multi-piece rod that fits inside your pack, and you are careful how you pack it, or you are staying on trail and aren't likely to smash into things with your rod tube, you can likely get away with 1/32 inch thickness material which cuts weight even more. 


Link to butyrate plastic rod tube material web site

Two Rod Tubes
case.jpg
The traditional tube looks elegant, but the butyrate plastic tube is better for backpacking

Net
I used to always agonize over whether or not to bring a net with me.  Landing a small fish rarely presents a problem, but landing a larger fish without a net can be pretty difficult, particularly if you're fishing with a lighter weight tippet. 
However, there are a number of lightweight solutions to the question of how to land a fish without 
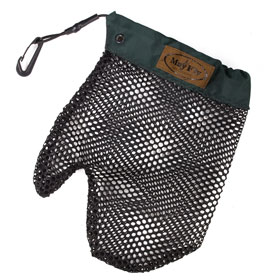
carrying a heavy net. 
The first is the Landing Hand.  It's a simple, lightweight piece of gear that looks like an oven mitt made out of a soft netting material. 
The Landing Hand
mf-landinghand_280.jpg
Link to Landing Hand Web Site
The Landing Hand works by giving you a good grip on the fish, so that you can grab the fish without it slipping out of your hands.  It does improve grip.  However, if you're trying to land a big trout that is thrashing around, actively trying to evade you, it can be pretty difficult to get a good grasp, even using the Landing Hand.  If you are using a long leader and tippet in relation to the length of your rod, it's even harder to grab the fish, because it's often out of your reach even with the rod raised high.  The Landing Hand works in many cases, but I've found that you need to play the fight out of the fish to ensure that it won't get away if you're using lighter tippet.  This isn't such a good thing if you want to release the fish unharmed, as an exhausted fish has a lower chance
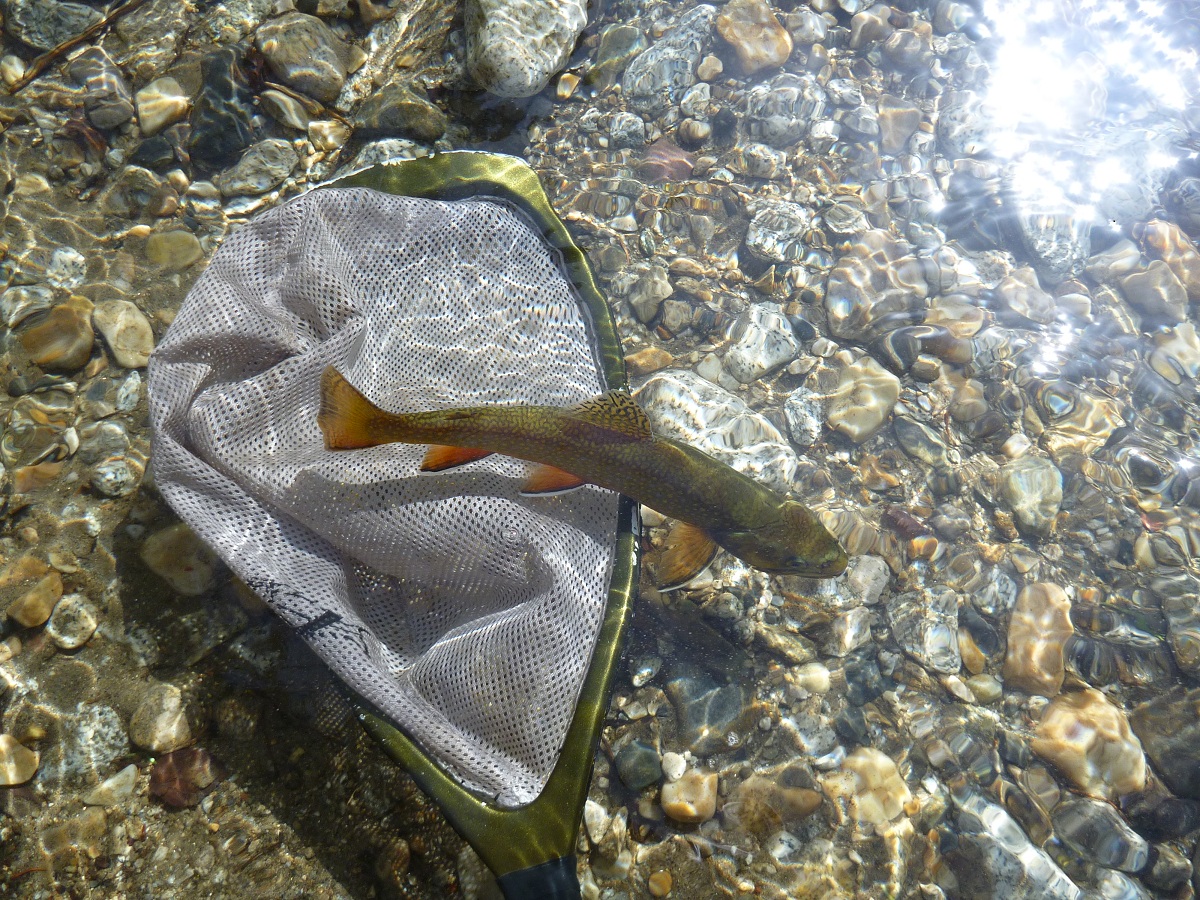
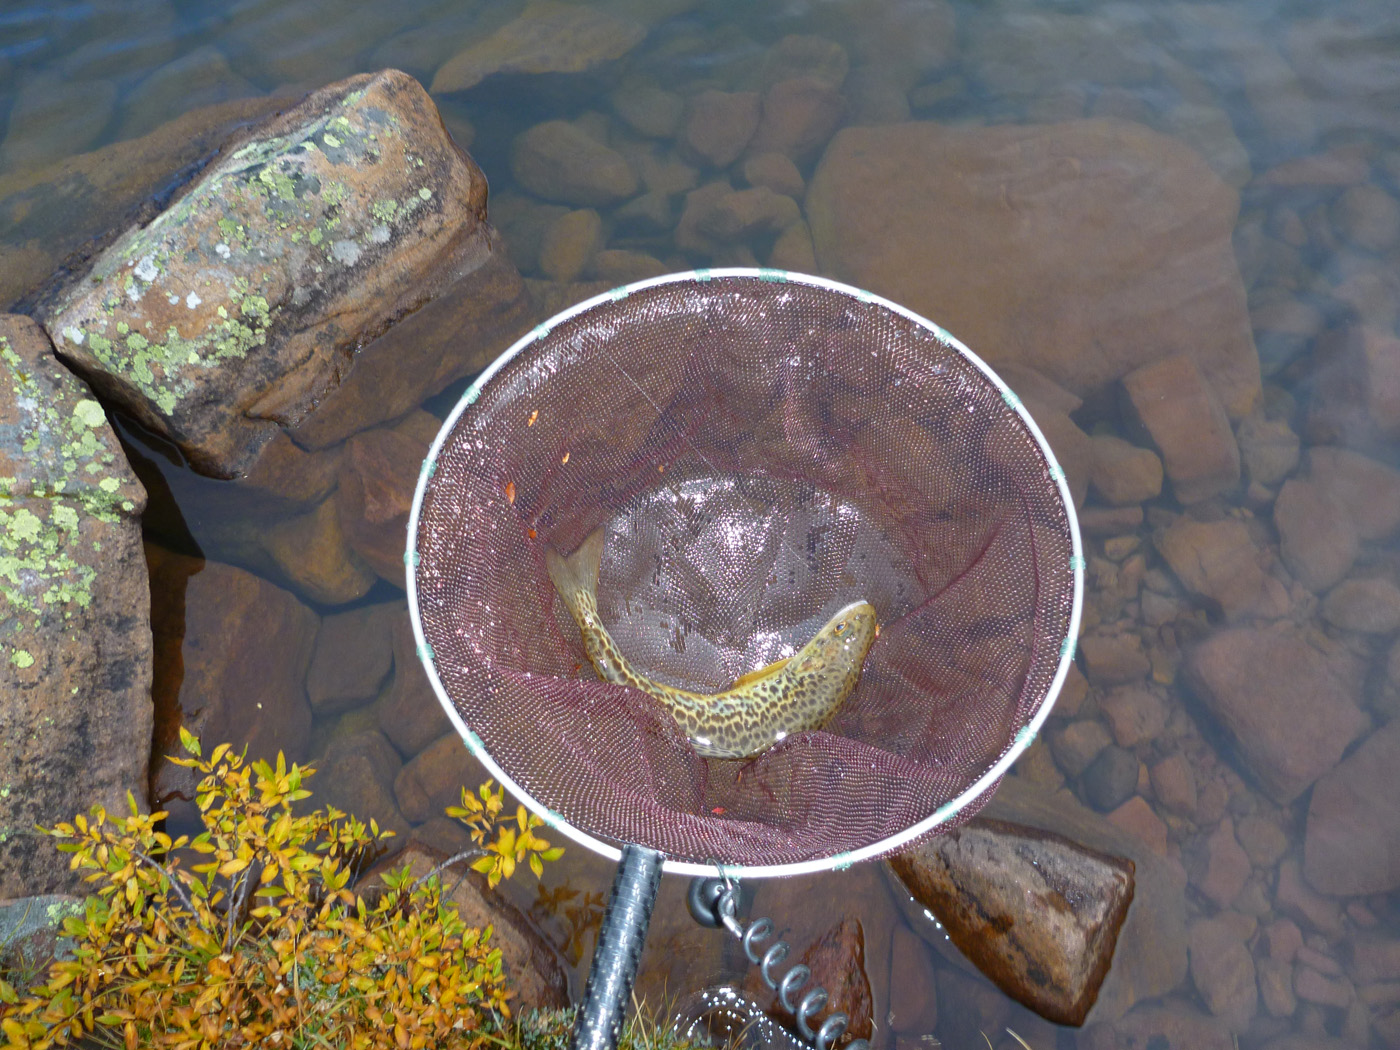
 of survival.     
The other alternative is to use a traditional landing net.  The lightest weight nets are made from carbon fiber or a combination of carbon fiber and titanium (see the Ti Net Below)   One of my favorite nets is the William Joseph "Wave" net.  The Wave net is made from carbon fiber, which is light and strong. Including a magnetic quick release, my Wave net weighs only 10.5 ounces. I hang the net off of the suspenders of my waders, using the magnetic quick-release. If you use a magnetic quick release, you will want to replace the steel eye on the handle of the net with a non-magnetic brass eye. (35 cents for a brass eye-screw at the local hardware store.)   Otherwise, the magnet will constantly stick to the eye rather than the other magnet half. 

William Joseph Wave Net

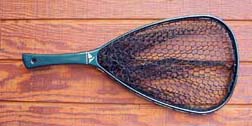
Although I prefer the uber light Ti Net for longer backpacking trips, I like the size and robust build of the Wave net for day hikes.   When paring down every ounce isn't a priority, the Wave provides a good mix of light weight and performance. 


S2 Products LZ1 Carbon Fiber Net

S2 Products is a company based out of Jackson, Wyoming that makes really nice lightweight carbon fiber landing nets.    Their lightest model is the LZ1, which weighs in at 9 ounces, but if you call them up and ask them nicely, they can make you a stripped down version with an lighter weight netting material and no lanyard that weighs about 7.5 ounces.    With the William Joseph carbon fiber net out of production, the LZ1 is your best (and only) option for a full sized lightweight net. 

LZ-1 Net
LZ1.jpg
S2 Designs web site

TrailLite Designs Ti-Net

This net is pretty much my answer to the backcountry net dilemma.   It's a real net that weighs only 2.4 ounces.  The handle is made from carbon fiber and the hoop is made from titanium.   It's only 9 1/2 inches in diameter, but that's better than not having a net at all.   With a magnetic quick release, the whole thing weighs only 3.1 ounces.    The net works great.  

Now that I have the Ti-Net, I will never go on a backcountry fly fishing trip without a net ever again. 

TrailLite Designs Web Page
Ti Net and Uinta Trout
tinet.jpg

Vest and Fly Boxes
 
A vest is not really a necessity.  You can stuff your shirt pockets with fly boxes and use a lanyard to hold all the rest of the fly fishing paraphanalia you need.  The biggest advantage of a vest is that it can function as a day pack to carry a windbreaker, lunch, headlamp and other necessities for a long day of fishing away from your main campsite.  The lightest weight traditional vests I've seen are made from mesh.  The mesh fabric has the added advantage of being cool as well as lightweight.  
These lightweight vests weigh in at about 12 ounces.  
 
My personal favorite vest is another piece of gear that is no longer available.  It's the William Joseph Ultralight Chest Pack. This chest pack weighs 6 and a half ounces. That weight includes two built in "zinger" retractor thingies to hold your nippers and hemostats. The pockets are large enough to easily accomodate large fly boxes, and anything else you might need on a day of fishing. It's comfortable to fish in all day.
 
If I didn't have the Ultralight, I'd probably just use a mesh vest.  I tend to bring a lot of stuff with me when I'm fishing, so a vest of some sort is my preferred option.  That said, none of my backcountry fishing friends use a vest.  They make due with a lanyard or just their pockets. 
 
For fly boxes, the lightest weight option is the foam fly boxes made by Morell.  They are light, durable, have a simple but secure magnetic closure, and float if you drop them.  They don't cost much either.  Their only disadvantage is that they aren't waterproof, so if you take a spill in the river, you're going to need to dry out your flies or the hooks will rust. 

 
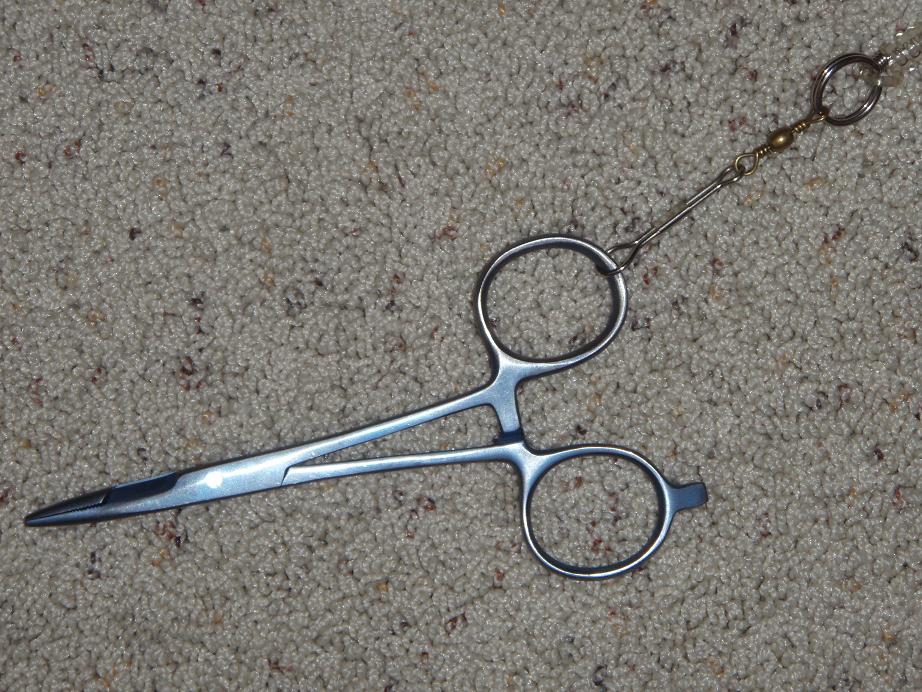
Dr. Slick Titanium Scissor Clamps.
 
Half the weight of steel. (and they're made from titanium, which is just cool.)   They have a scissors, so they will cut as well as clamp.  I attach them with a swivel, so they can turn freely.  This helps me when I tie a clinch knot.  I hold the fly in the clamp, then twirl it around to form the twists in the line as the first step in tying the clinch knot. 

Titanium Scissor Clamp with Swivel Attachment
slick.jpg

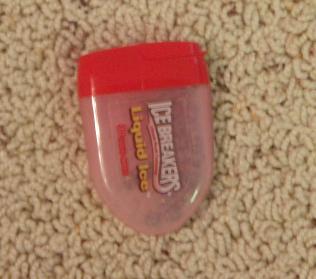
Split Shot Dispenser
Hershey's Icebreakers Liquid Ice mints. The packages for these mints make the best split shot dispensers I've found. They are small and convenient and designed to dispense one at a time.
Ice Breaker Package Makes Great Shot Dispenser
mint.jpg

Frontier Water Filter Straw by McNett
This is a super lightweight water filter that allows you to sip water directly from the creek you are fishing in.  If you're out fishing all day, carrying enough water can be problematic.  Now, I just carry a small water bottle and this filter straw.  I drink from the bottle when I'm not on the water, and use the straw to drink while fishing. 

Frontier Water Filter Straw
aqm_frontier1.jpg

Loon UV Wader Repair
 
This is a repair glue substance similar to Aquaseal, except that it cures by exposure to ultra-violet light as opposed to evaporation of volatile chemicals.  The result is that it cures very rapidly.  It's good for repairing waders in the field (small punctures only, not huge rips.)  It also works for repairing holes in tents, jackets, and other things that need sealing or gluing.  It's simple to use.  Keeping it in the shade, you just squeeze a drop or two onto the puncture, then work/smear it into the hole.  Then hold it in direct sunlight for a few minutes and you're done.   

Repair kit in a Tube
loon.jpg

Back to the Backcountry Main Page

Click HERE to visit my Bamboo Fly Rod Pages

Click here to access my blog to see my latest blog posts and website updates: